Wall thickness for 3D printing: the minimum and what to use
A wall that looks solid in CAD can come out of the slicer as two thin lines with a gap between them, or not at all. The fix is to design walls in the printer’s own unit: the width of one extruded line.
Short answer
With a 0.4 mm nozzle, treat 0.8 mm (two lines) as the absolute minimum for any wall, and design most walls at 1.2–1.6 mm (three or four lines). Use 2 mm or more for walls that carry load or hold screws. Make walls a whole multiple of your line width so the slicer fills them cleanly, and make floors and roofs a whole number of layers: at 0.2 mm layers, 1.0–1.2 mm is five or six layers.
You design a neat enclosure with 1 mm walls. The slicer preview shows two outlines per wall and a thin, zig-zagging filler line squeezed between them, or a gap of air. The part prints, but it feels flimsy, and light shows through the corners.
Nothing was wrong with 1 mm as a number. It just wasn’t a number the printer thinks in. A nozzle lays plastic in lines of a fixed width, so the best walls are a whole number of those lines. Design in that unit and the slicer fills every wall cleanly.
Think in lines, not millimetres
A 0.4 mm nozzle doesn’t lay a 0.4 mm line. The plastic is squashed as it leaves, so slicers use a line width of about 0.42–0.45 mm by default. Each outline of a wall (a perimeter) is one of those lines.
clean wall thickness ≈ number of perimeters × line width
You don’t need to be exact to a hundredth. Aim close to a whole number of lines, and check the slicer preview for a thin filler line in the middle of your walls. If you see one, nudge the thickness.
What thickness to use
| Wall | Thickness | Lines | Use it for |
|---|---|---|---|
| Absolute minimum | 0.8 mm | 2 | Non-structural skins, labels, light covers |
| General purpose | 1.2–1.6 mm | 3–4 | Enclosures, boxes, most household parts |
| Load-bearing | 2.0–3.0 mm | 4–6 | Brackets, hooks, walls with screws or inserts |
| Watertight | 1.6 mm or more | 4+ | Planters, cups, anything that holds liquid |
Loftsmith’s print check flags any part of a model thinner than twice the nozzle width (0.8 mm on a 0.4 mm nozzle), and reports how much of the cross-section is affected and at what height, so thin spots show up before you slice.
Walls that fall between two widths
Older slicers could only print whole lines, so a 1.0 mm wall became two lines plus a gap, or a gap-fill squiggle. Modern slicers (PrusaSlicer, Cura, Bambu Studio and OrcaSlicer all ship this) vary the line width instead, and handle odd thicknesses much better.
That makes the rule less strict than it used to be, not irrelevant. Whole-line walls still print faster, look cleaner and are stronger, because every line is a full, continuous perimeter. For a part you care about, design the wall to the lines.
Floors, roofs and layer height
The same idea applies vertically, in layers instead of lines. A floor or roof prints as a stack of solid layers, so make it a whole number of layers thick.
- Floors: at least four or five layers, so 0.8–1.0 mm at 0.2 mm layers. Use 1.2–1.6 mm for containers and anything that carries weight.
- Roofs over infill: at least five or six layers. Fewer, and the top surface sags into the infill below it (called pillowing).
- Small steps and ledges: make them a multiple of the layer height too, or the slicer rounds them and they vanish.
Ribs instead of thick walls
When a wall needs to be stiffer, making the whole thing thicker is the least efficient fix. Plastic far from the middle of a wall does most of the work in bending, so a 1.6 mm wall with a few ribs behind it is stiffer and lighter than a solid 4 mm wall.
- Make ribs about the same thickness as the wall, or a little thinner, so they don’t leave sink marks or warp.
- Run them in the direction the wall bends.
- Add a small fillet where a rib meets the wall.
For walls that carry real load, the weight guide shows how thickness affects strength: doubling it makes a part four times as strong.
Check before you slice
- Pick a wall thickness from the table, rounded to a whole number of lines.
- Set the slicer’s wall (perimeter) count so walls print solid, not as outlines around infill.
- Look at the slicer preview for gap-fill lines inside your walls.
- For screw holes and inserts, leave at least 1.6–2 mm of solid wall around the hole (see the screw hole guide).
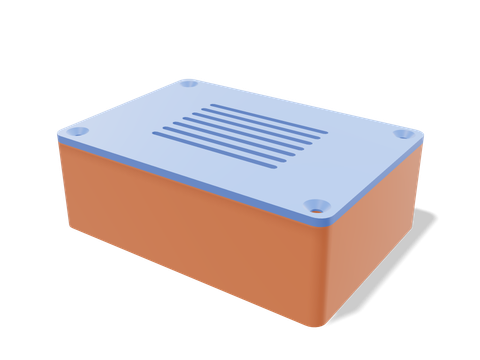 Electronics enclosureAn enclosure whose walls, standoffs and lid are sized for a 0.4 mm nozzle and checked for thin spots.96 × 67 × 33 mm · 49 g · 1 h 15 min
Questions people ask
What is the minimum wall thickness for 3D printing?
About two extrusion widths: 0.8 mm with a 0.4 mm nozzle. Thinner features may print as a single wobbly line or be dropped by the slicer entirely. Loftsmith flags any feature thinner than twice the nozzle width.
What wall thickness should I use for PLA?
1.2–1.6 mm for general parts and enclosures, 2 mm or more for parts that carry load, hold screws or must be watertight. The material matters less than the line width of your nozzle.
Should wall thickness be a multiple of the nozzle size?
A multiple of the line width, which is usually a little wider than the nozzle (about 0.42–0.45 mm for a 0.4 mm nozzle). Whole multiples fill cleanly; in-between values leave a gap or a thin filler line, although modern slicers handle them better than they used to.
How thick should the bottom of a 3D print be?
At least four or five layers, so 0.8–1.0 mm at 0.2 mm layer height. For containers that must hold water, or floors that carry weight, use 1.2–1.6 mm.
Sources and method
The numbers come from Loftsmith’s CAD engine, which uses them to design and check every part it builds, and from the manufacturer and reference sources below. Every figure is checked against those sources and the engine’s own geometry. Found a mistake? Email [email protected] and we’ll fix it.