How much weight can a 3D printed hook, bracket or shelf hold?
There is no single number, because the answer depends on the shape far more than the plastic. The good news: the arithmetic for a hook or a bracket fits on a sticky note, and it tells you which dimension to change.
Short answer
A printed hook or bracket usually fails by bending at its root. Bending stress = 6 × load × reach ÷ (width × thickness²). Double the load for anything hung on suddenly, and keep the result under about a third of the plastic’s printed strength along its layers: about 16.7 MPa for PLA. Loftsmith’s default wall hook (12 mm deep, 20 mm wide, 55 mm reach) sees 5.6 MPa with 5 kg hanging still, and 14.9 MPa inside its bend once the sudden load and the curve are counted. Doubling thickness makes a part four times stronger; doubling width, only twice. Heat, creep and the screws in the wall often limit a part before the plastic does.
“How much can it hold?” is the first question anyone asks about a printed hook, and the honest answer is a question back: which hook? A 4 mm thick decorative hook and a 10 mm thick utility hook, printed from the same spool, can differ in strength by a factor of six. The plastic is only part of it. The shape does most of the work.
The good news is that the arithmetic for hooks, brackets and shelf supports is short, and it points straight at the dimension to change. Then there are a few printing facts, about layers, heat and screws, that decide whether the arithmetic holds up on the wall.
Where a hook breaks
Hang a bag on a hook and the arm acts as a lever. The weight pulls down at the tip; the arm tries to rotate about the point where it leaves the back plate. That point, the root, carries the most stress, and it is where almost every printed hook, bracket and shelf support cracks.
The stress at the root depends on the load, how far out the load hangs (the reach), and the size of the arm’s cross-section at the root. So that is what we calculate.
The sticky-note formula
bending stress = 6 × load × reach ÷ (width × thickness²)
load in newtons (kilograms × 9.81), reach in mm from the root to where the load hangs, width and thickness in mm at the root, with thickness measured in the direction the load bends the arm. The result is in megapascals (MPa).
Then compare the result with a limit. Loftsmith’s engine allows 16.7 MPa for PLA, a third of the roughly 50 MPa a well-printed PLA part reaches when pulled along its layers. Machine-design texts suggest a factor of about three for a material whose strength varies from print to print. Across the layers the engine allows a quarter of about 20 MPa, because the layer bond is weaker and fails without warning.
The formula says three useful things before you plug in a single number:
- Thickness is squared. Double it and the arm is four times as strong. This is the best lever you have.
- Width is not. Double the width and you only double the strength, for twice the plastic.
- Reach multiplies everything. A hook that sticks out twice as far sees twice the stress for the same bag.
Two corrections take the sticky note from optimistic to honest:
- Sudden loads count double. A bag dropped onto a hook, even from no height at all, briefly loads it twice as hard as the same bag at rest.
- Tight bends are worse than straight arms. Inside a curve, the stress piles up on the inner edge, a quarter or more above the formula for a typical hook. Curved-beam theory gives the exact figure. Give the bend a generous inside radius and put the extra material there.
A worked example: the wall hook
Loftsmith’s free wall hook is 12 mm deep and 20 mm wide at the root, with a 55 mm reach, and is designed for 5 kg. The sticky-note formula gives:
6 × (5 × 9.81 N) × 55 mm ÷ (20 mm × 12² mm²) = 5.6 MPa
That is the bag hanging still. Double it for a bag hung on suddenly and add the tight-bend effect, and the hook’s build report shows the full check: 14.9 MPa inside the bend at 5 kg hung suddenly (curved beam x1.28); PLA allows 16.7 along the layers. It passes, but not by much, which is the point of a design load. Now watch what small changes to the thickness do to the sticky-note figure:
| Thickness at root | Bending stress | Load at the 16.7 MPa limit |
|---|---|---|
| 8 mm | 12.6 MPa | 6.6 kg |
| 10 mm | 8.1 MPa | 10.3 kg |
| 12 mm | 5.6 MPa | 14.9 kg |
| 14 mm | 4.1 MPa | 20.2 kg |
| 16 mm | 3.2 MPa | 26.4 kg |
Two extra millimetres of thickness take the hook from about 15 kg to about 20 kg of short-term capacity. No infill setting comes close to that.
Layers are the grain
A printed part is strong along its layers and much weaker across them, because the bond between two layers is never as good as a single continuous line of plastic. Tests commonly show the cross-layer strength at around half of the in-layer strength, and worse on a badly tuned printer.
So orient the part so the bending stress runs along the layers. For a wall hook, that means printing it lying on its side, so every layer contains a whole hook outline. Printed standing up, the same hook has a layer line exactly at its root, where the stress peaks, and it will snap cleanly along that line at a fraction of the load.
Walls beat infill
In bending, the plastic farthest from the middle of the arm does almost all the work. That is exactly where the slicer puts the walls (perimeters) and the top and bottom skins. Infill sits in the middle, where it contributes least.
So for load-bearing parts, raise the wall count before the infill: four to six perimeters on a hook or bracket add much more strength per gram than going from 20% to 100% infill. For small, highly loaded parts, it is often simplest to set enough walls that the arm prints solid.
Heat and creep
The formula gives a short-term answer. Two slower effects matter for anything that hangs for months.
| Material | Softens around | Fine for |
|---|---|---|
| PLA | 55–60 °C | Indoors, away from windows and heaters |
| PETG | 75–80 °C | Warm rooms, sheds, most outdoor shade |
| ASA | about 93–95 °C | Sun, cars, outdoor fixtures |
Creep is the slow sag of plastic under a constant load, and PLA does it more than you’d expect even at room temperature. A shelf bracket that holds a stack of books on day one may droop by the end of the year. For loads that never come off, keep the sustained stress well under the limit (the example hook’s 5.6 MPa at rest is about a third of it), or switch to PETG or ASA.
The wall, the screws and the anchor
A hook is only as strong as the thing holding it up, and that is often the weakest part of the system. Before you trust a number from the formula, check the rest of the chain:
- The anchor. A screw in drywall without an anchor may hold a few kilograms at most. Use anchors rated for the load, or find a stud.
- The screw holes. Leave at least a screw diameter of plastic between the hole and any edge, and use a countersink or washer so the head spreads its force. The screw hole guide has the sizes.
- The back plate. The load tries to peel the top of the plate off the wall. Put a screw near the top, not only in the middle.
A checklist before you hang it
- Work out the bending stress at the root, double the load if it is hung on suddenly, and keep it under about 16.7 MPa for PLA, lower for loads that never come off.
- Print so the layers run along the arm.
- Use four or more walls, and add a fillet where the arm meets the plate.
- Pick PETG or ASA for anything warm or outdoors.
- Check the anchor and the screws, not just the plastic.
- Load it gradually the first time, and keep your feet out from underneath.
Loftsmith’s wall hook runs this bending check live and shows it in the build report, so when you change the load, reach or thickness, the stress updates with it. When you describe a load-bearing part in the Studio, say the load (“holds an 8 kg backpack”) and it is checked against your filament.
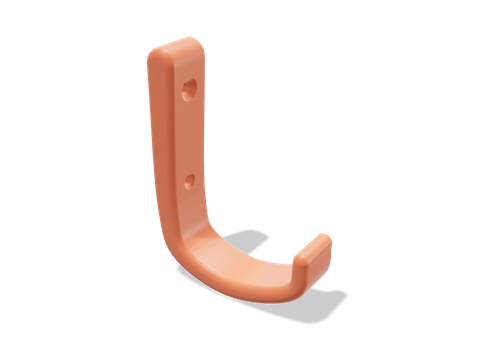 Wall hookA wall hook with a live curved-beam check. Set the load and reach and watch the stress.66 × 20 × 90 mm · 12 g · 21 min
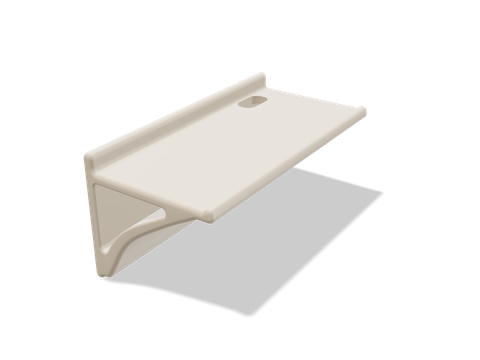 One-piece keyhole shelfA one-piece shelf on hidden keyholes, with its deck and screw pull-out checked for your load.90 × 180 × 83 mm · 134 g · 3 h 16 min
Questions people ask
How much weight can a 3D printed hook hold?
A well-oriented PLA wall hook 12 mm deep and 20 mm wide with a 55 mm reach carries 5 kg hung on suddenly at just under the 16.7 MPa Loftsmith allows for PLA, and about 15 kg hanging still at the same limit. A thin decorative hook may hold less than 1 kg. Work it out with bending stress = 6 × load × reach ÷ (width × thickness²).
Is PLA or PETG stronger for load-bearing parts?
PLA is stiffer and has higher short-term strength; PETG is tougher, bonds its layers better and survives heat to about 75–80 °C instead of about 55–60 °C. For a shelf in a warm room or a car, choose PETG or ASA even though PLA wins on paper.
Does more infill make a 3D print stronger?
Less than you’d think for bending. Bending stress is carried by the outer skin, so extra perimeters (walls) add far more strength per gram than going from 20% to 100% infill.
Which way should I print a hook for strength?
So the layers run along the arm, not across it. A hook printed standing upright has every layer line exactly where the bending stress peaks; printed on its side, the same hook is several times stronger.
Will a PLA shelf bracket sag over time?
It can. PLA creeps under constant load, especially above room temperature. Keep sustained stress low (a quarter to a third of the short-term limit is a sensible target), or use PETG, ASA or a metal-reinforced design.
Sources and method
The numbers come from Loftsmith’s CAD engine, which uses them to design and check every part it builds, and from the manufacturer and reference sources below. Every figure is checked against those sources and the engine’s own geometry. Found a mistake? Email [email protected] and we’ll fix it.