树莓派 5 外壳生成器
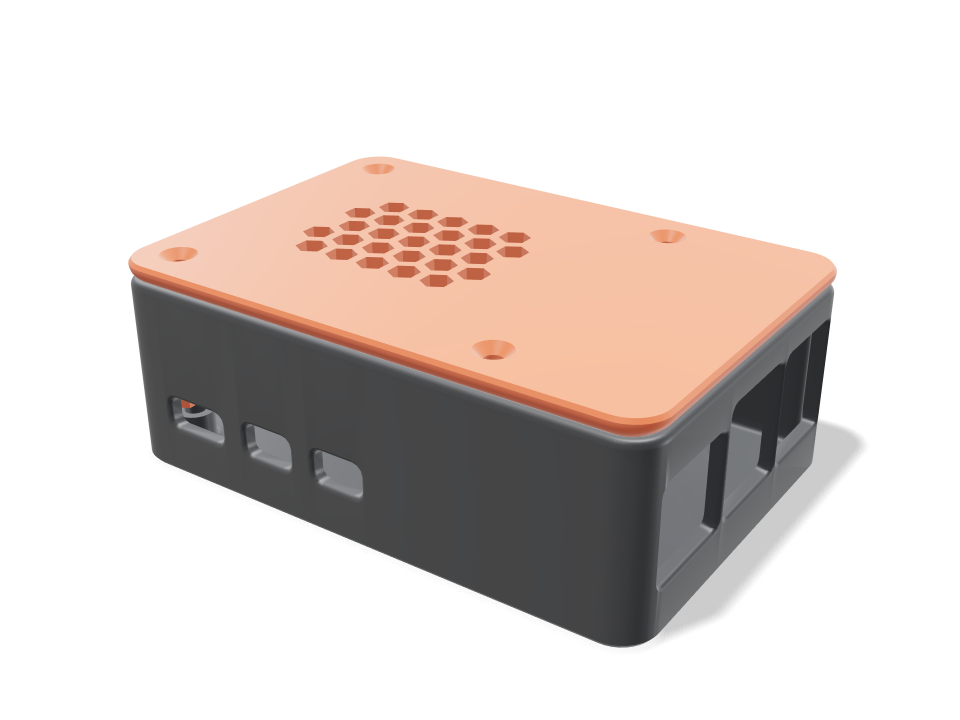
每个开孔都按电路板的官方接口位置留出间隙切出,并做成外扩的圆角开口,而不是冲压出来的直边。电路板装在带 M2.5 热熔螺母的铜柱上。盖子整圈都是圆角,SoC 上方有六边形散热区,并拧在同一组铜柱上方的立柱上。电路板和接口以虚影建模,所以校验能证明每个接口都能穿过开孔、电路板不碰壁、盖子能盖过较高的接口。
Building the model
Loading the 3D view
No adjustable sizes
Ask for the sizes you want to tweak, e.g. “make the width adjustable”.
默认尺寸下的规格
在 Bambu Lab A1 上用 PLA 实际构建测得。拖动上方滑块时,每个数字都会实时更新。
- 整体尺寸
- 92 × 63 × 34 mm
- 零件数
- 2
- 耗材
- 47 g
- 打印时间
- 1 h 15 min
- 打印盘
- 1
- 支撑
- 不需要
工程校验
校验和参数名称直接来自 CAD 引擎,以英文显示。
- Lid seats over the boardlip relieved around the connectors; overlap 0.00 mm³
- Every connector passes its opening6 of 6 connectors clear the case, 1 mm around each
- Board sits free of the walls1.2 mm along the sides; its rounded corners clear the 6 mm case corners (overlap 0.00 mm³)
- Room above the board22 mm for the heatsink or active cooler
- Inserts fully seatedM2.5 inserts 4.5 mm long in 5 mm standoffs
- driver: lid screws goes in20 poses along its path clear of every part.
可调尺寸
| 设置 | 默认 | 范围 |
|---|---|---|
| Port clearance | 1 mm | 0.5–2 mm |
| Space above the board (fan, heatsink) | 22 mm | 18–28 mm |
| Vent hex size | 6 mm | 4–9 mm |
零件清单
| 零件 | 数量 | 尺寸(mm) | 耗材 | 时间 |
|---|---|---|---|---|
| case | 1 | 92 × 63 × 31 | 29 g | 45 min |
| lid | 1 | 92 × 63 × 25 | 18 g | 30 min |
制作方法
- 为散热器或风扇设置电路板上方的空间(官方主动散热器需要 16–20 mm)。
- 如果你的线材插头较粗,就加大接口间隙。
- 底壳直立打印,盖子正面朝下打印,熔入四颗 M2.5 热熔螺母,再拧上盖子。
打印建议
- 靠近发热的树莓派 5 请用 PETG;PLA 在持续 60 °C 下可能会蠕变。
- 无需支撑:接口开口向外扩,盖子正面朝下打印。
常见问题
官方主动散热器放得下吗?
默认 22 mm 空间可以。允许范围是 18–28 mm;再高很多的话,盖子立柱会变得过细。
需要哪些五金件?
四颗 M2.5 热熔螺母和四颗 M2.5 螺丝。热熔螺母深度会对照铜柱高度校验。
Comments