电子外壳生成器
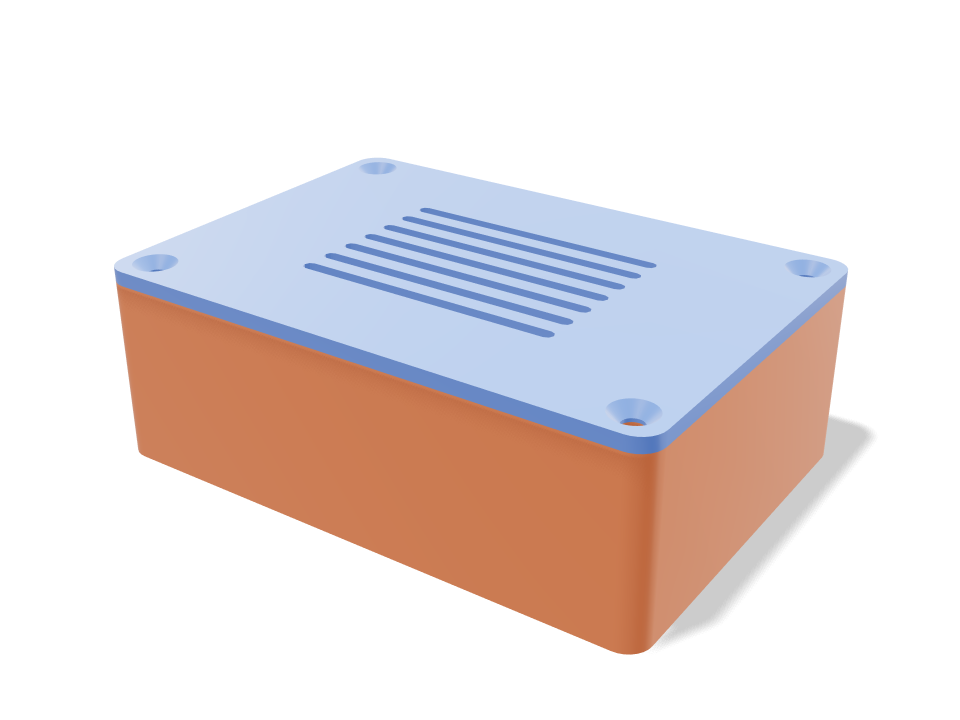
选好电路板,外壳会按它真实的安装孔位放置铜柱,加上用于 M3 热熔螺母的角柱,在电路板高度开出 USB-C 孔,并做一个用沉头螺丝固定的散热盖。
Building the model
Loading the 3D view
No adjustable sizes
Ask for the sizes you want to tweak, e.g. “make the width adjustable”.

What Loftsmith can do
See what Loftsmith designs
Straight from the Loftsmith Workshop, every print check passed. Need a part this page can't make? Describe it and Loftsmith designs it for you.
默认尺寸下的规格
在 Bambu Lab A1 上用 PLA 实际构建测得。拖动上方滑块时,每个数字都会实时更新。
- 整体尺寸
- 96 × 67 × 33 mm
- 零件数
- 2
- 耗材
- 49 g
- 打印时间
- 1 h 15 min
- 打印盘
- 1
- 支撑
- 不需要
工程校验
校验和参数名称直接来自 CAD 引擎,以英文显示。
- Standoffs clear the wall3 mm
- driver: lid screws goes in20 poses along its path clear of every part.
可调尺寸
| 设置 | 默认 | 范围 |
|---|---|---|
| Board | rpi-4 | — |
| Space around board | 3 mm | 1–15 mm |
| Inner height | 28 mm | 12–80 mm |
| Wall | 2.4 mm | 1.6–4 mm |
| Lid vents | 开 | 开 / 关 |
零件清单
| 零件 | 数量 | 尺寸(mm) | 耗材 | 时间 |
|---|---|---|---|---|
| enclosure | 1 | 96 × 67 × 30 | 35 g | 52 min |
| lid | 1 | 96 × 67 × 2 | 14 g | 22 min |
制作方法
- 选择你的电路板。
- 设置电路板四周的间隙,以及给扩展板/HAT 留的内部高度。
- 熔入 M2.5 和 M3 热熔螺母。
- 装上电路板,拧上盖子。
打印建议
- 靠近发热的单板电脑请用 PETG;PLA 在 60 °C 下可能蠕变。
- 热熔螺母孔按常见的 CNC Kitchen 式热熔螺母尺寸设计。
常见问题
可以加更多接口吗?
把接口描述给 Loftsmith AI(例如“长边上两个 micro-HDMI 和一个网口”),它会在正确的位置开孔。
需要目录里没有的形状? 用文字生成 CAD,用你自己的话描述它
Comments