手机充电支架生成器
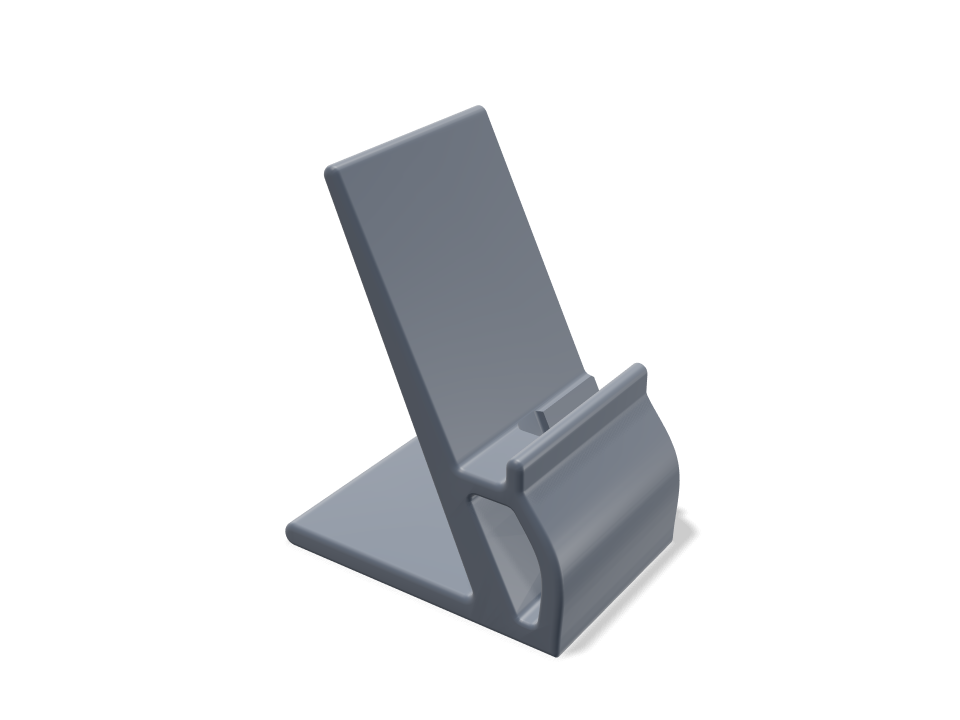
一条融合的侧面轮廓:从长底座升起、逐渐收窄的靠背,手机下方是一个圆角窗口。充电线从一开始就规划好了。USB-C 插头从托板上的槽口穿下去,线在窗口内以不小于四倍线径的柔和半径转弯,然后压进底座下方的线槽,从背后悄悄走出。校验覆盖常见手机壳厚度的两端:最厚的壳能越过挡边,最薄的手机仍然被托住,最高的手机不会倾倒,插头和线穿过时不会刮碰。
Building the model
Loading the 3D view
No adjustable sizes
Ask for the sizes you want to tweak, e.g. “make the width adjustable”.
默认尺寸下的规格
在 Bambu Lab A1 上用 PLA 实际构建测得。拖动上方滑块时,每个数字都会实时更新。
- 整体尺寸
- 100 × 70 × 127 mm
- 零件数
- 1
- 耗材
- 68 g
- 打印时间
- 1 h 40 min
- 打印盘
- 1
- 支撑
- 不需要
工程校验
校验和参数名称直接来自 CAD 引擎,以英文显示。
- Thickest case clears the lipoverlap 0.0 mm³ with a 16 mm case; 1 mm designed gap
- Thinnest phone is still heldlip rises 5.5 mm above a 8 mm phone's front edge
- Stable with the tallest phonecentre of mass -38 mm, base ends at -62 mm
- Plug sits in its pocketoverlap 0.00 mm³ for 8-16 mm phones
- Lead lies free in its channeloverlap 0.00 mm³, 143 mm of lead inside the stand
- Lead bends gentlytightest bend 16 mm = 4.0x a 4 mm lead
- Lead slides into the shelf slit from the sidea 4 mm lead swept in 9 steps from outside the stand to the plug pocket: worst overlap 0.00 mm³
- Lead snaps into the base groove and stayskeyhole groove: 3.4 mm mouth for a 4 mm lead (the jacket squeezes through and is held); free once seated
- Lead hidden: leaves at the backnever in front of the chin; exits 14 mm behind the base
- phone (thickest case) goes in24 poses along its path clear of every part.
- USB-C plug goes in18 poses along its path clear of every part.
可调尺寸
| 设置 | 默认 | 范围 |
|---|---|---|
| Lean angle | 64 deg | 55–75 deg |
| Width | 70 mm | 56–96 mm |
| Thickest phone + case | 16 mm | 10–18 mm |
| Charging lead diameter | 4 mm | 3–6 mm |
制作方法
- 输入你会用到的最厚手机加壳厚度,以及充电线的直径。
- 选择倾角;桌面上 60–70° 比较合适。
- 侧放打印,把插头从槽口穿下去,再把线压进底部的线槽。
打印建议
- 侧放打印,让层纹沿着靠背方向;无需支撑。
- PLA 或 PETG。打印整个支架之前,先确认你的插头外壳能穿过槽口。
常见问题
我的插头能穿过槽口吗?
槽口按常见 USB-C 插头外壳尺寸留了间隙。插头各不相同,请量一下你的;线径设置决定线槽大小。
厚手机壳能用吗?
能。输入你用的最厚的壳,校验会证明它能越过挡边,同时薄手机仍然被托住。
Comments